You are using an out of date browser. It may not display this or other websites correctly.
You should upgrade or use an alternative browser.
You should upgrade or use an alternative browser.
SCX20
- Thread starter Pthein
- Start date
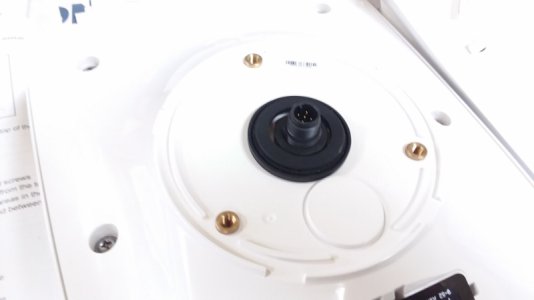
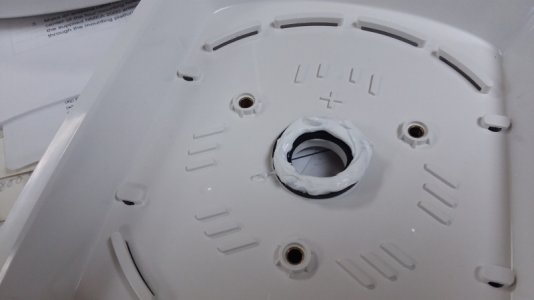
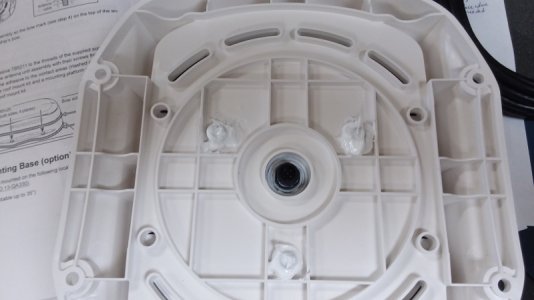
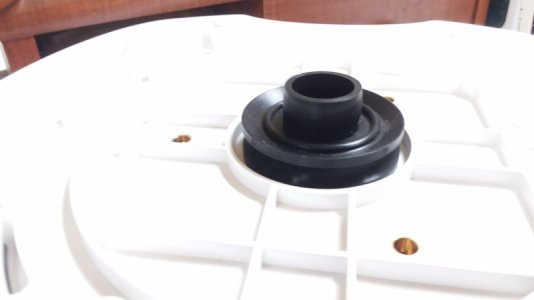
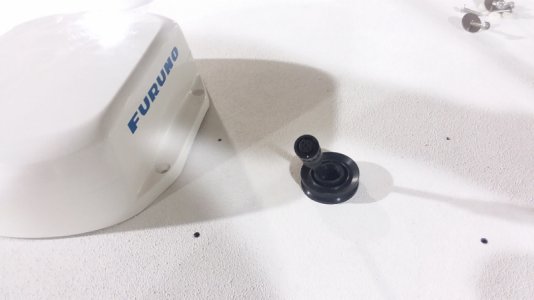
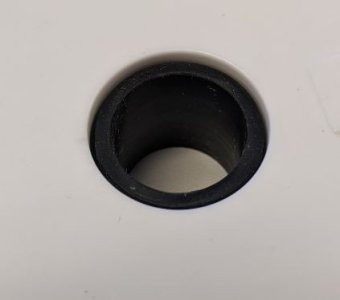
Did you push that gasket into the hole where one lip is up inside the bottom mount and the other lib is below? Not having the production unit here, I can't see but that looks like it from your photo. I could be wrong but the seal shouldn't sandwich like that. The seal should accordion at the bottom so it extends down to push down on the hard top. Here is how mine looks from the top and bottom. I wish I had a production unit to look at. It is possible they made changes for the production.
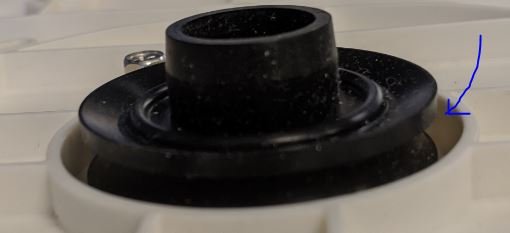


Oh no Johnny! The much larger roof mount gasket will be mounted exactly as you've shown with the "nipple" going down into the 25mm hole drilled in the buggy top. The "attachment gasket" is a stepped flat gasket and the smaller diameter fit perfectly inside the recess on the top of the base.
Attachments
.
.
I guess what you are calling the roof gasket, I am calling the attachment gasket.
.
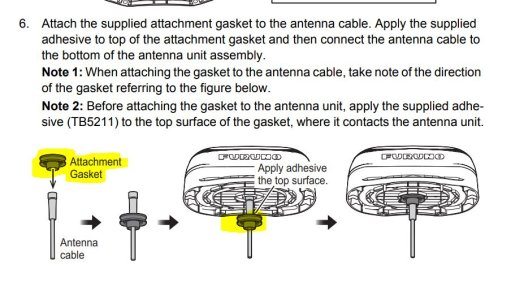
The other gasket you are talking about I am not sure of. I have concern it is for another mounting solution. It shouldn't be a problem as long as the unit closes good with the base, otherwise it might cause the unit to raise up too much from the base and have a larger than typical gap. Not having one to check, I will defer that to you. Looking good.
.
I guess what you are calling the roof gasket, I am calling the attachment gasket.
.

The other gasket you are talking about I am not sure of. I have concern it is for another mounting solution. It shouldn't be a problem as long as the unit closes good with the base, otherwise it might cause the unit to raise up too much from the base and have a larger than typical gap. Not having one to check, I will defer that to you. Looking good.
mikek":17of7dd4 said:Can you post some pics when you install it? I have one that should be here next week and a little confused after reading this.
I'll be happy to!
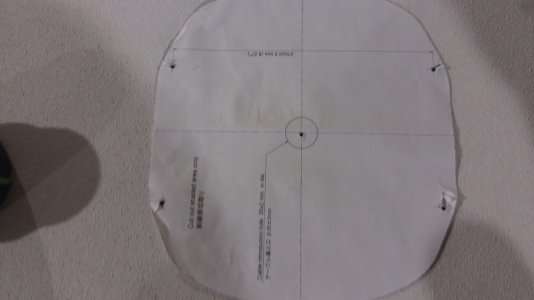
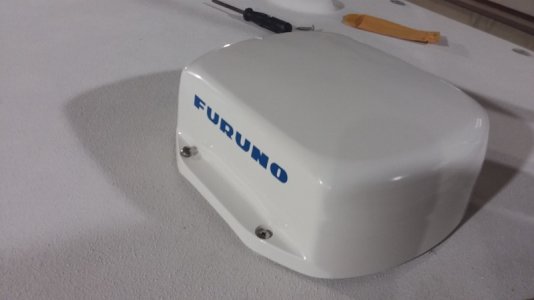
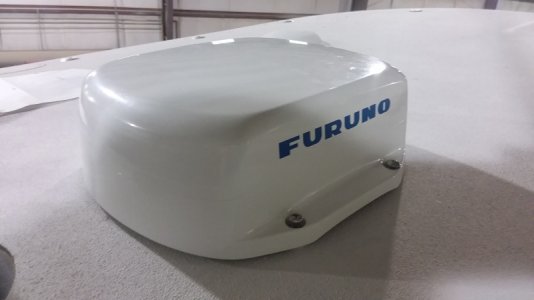
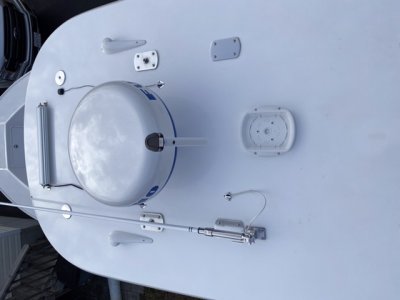
Drilling pilot holes using pattern lined up on centerline and taking into account access below. Center hole is 25mm for Roof Mount gasket and in this case I was able to through bolt the aft two screws into a spreader light pod. Forward holes use supplied screws.
Because the buggy top has some crown, nylon shims are required to maintain the proper compression on the big gasket and not distort the mount.
Note to self, never assume a buggy top is evenly crowned! Good thing this is a dry fit run, some shaving of shims has to be done to level it out!
Because the buggy top has some crown, nylon shims are required to maintain the proper compression on the big gasket and not distort the mount.
Note to self, never assume a buggy top is evenly crowned! Good thing this is a dry fit run, some shaving of shims has to be done to level it out!
Attachments
Nice look! Well done.
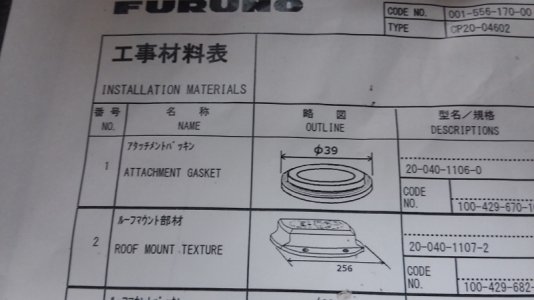
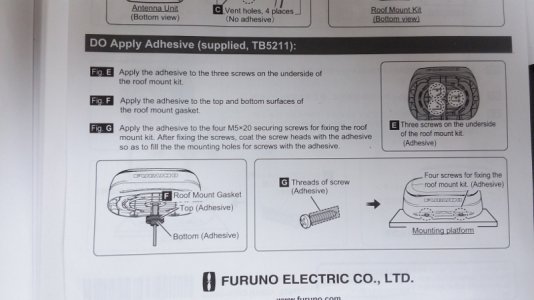
I just received my SCX20 and found the same gasket issue. If you look at the roof mount BOM that is in the operators manual, there is an attachment gasket (item 1) and a roof mount gasket (item 3). The 2 gaskets are packed nested and look like one piece but they are not. Unfortunately the instructions call the BOM roof mount gasket the attachment gasket which is a discrepancy in the documentation. The instructions say nothing about the BOM attachment gasket. I too found that what the BOM calls the attachment gasket fits nicely between the roof mount and the SCX20 with some play which may go away when the 3 screws are installed. This BOM attachment gasket did not make it into the assembly instructions and the naming error in the assembly instructions adds further confusion. I don' believe the BOM attachment gasket needs sealant thinking that it will fit tighter when the 3 screws are installed. Some clarification on this would be nice. Hope this helps....
I agree that the documents need some clarity and as soon as we get more and stock, I will document this for Japan to make changes. Right now, I think Bill is our resident expert 
Okay, I think I understand the grommet and how to install it. Any recommendations on where to install it on a 27’ center console? I would like to put it in front of the radar between the light bar but don’t have access to the underside of the hardtop there. Putting it behind the radar would get in the way if I add a folding Cobia tower.
Attachments
You want the top of the SCX20 to be below the lower part of the radar beam or it will slowly get burned out. I would take a string and run it down about 11 degree angle from the center of the Furuno lettering to ensure that SCX20 is below the beam (String). NMEA 0400 installation standards require three feet from the VHF/AIS antenna or you are also risk damage to the SCX20 receiver. I can't tell how much distance you have by the photo but the more the better. I don't see any other concerns from the photo.
The radar is in a 5” mount with a 6 degree forward wedge so I don’t think it will be anywhere near the beam behind the radar. The VHF is a different story. It will probably be within 18-24 inches of the antenna. Is that going to be a huge issue? Things get tight on small boats.
Attachments
Quitsa
Furuno Super Fan
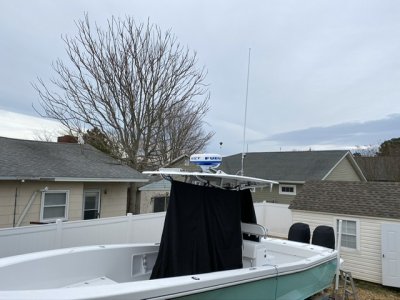
Johnny- Just to be sure, if you look at the safe mounting distance diagram in the back of the manual, it shows the distance being measured from the end of the radar antenna, not the center. With a six foot array, that three foot is a significant difference on a smaller boat. My installation as shown in Bill's photos would be close but okay measured from the center and pretty comfortable clearance from the end. Fortunately the tower hardtop on which the SCX20 is mounted is made with carbon fibre cloth and I suspect is quite a good shield against the radar signals.
Is the risk of damage to the SCX20 lower with a solid state radar like my new DRS25A-NXT than a 25kW magnetron? I assume it would be safer for compasses and not just people!
Is the risk of damage to the SCX20 lower with a solid state radar like my new DRS25A-NXT than a 25kW magnetron? I assume it would be safer for compasses and not just people!
The radar measurement is from the center of the Furuno lettering on a dome radar is because that is roughly where the radar beam comes out and where the internal array sits. The three feet discussed has nothing to do with the radar, that measurement was in relation to the VHF and SCX20. When it comes to distance from the radar you don't want sensitive receive items in the beam at all; if possible, regardless of distance. (Like GPS, Sirius, Sat compass) Yes, I believe having a solid state will help some but these units are designed to pick up very low amounts of power coming down from satellites that are very far away. Even a solid state would be like having your wife scream in your ear as you are tying to listen to the ball game. I can't tell you when or if the hearing loss will occur, except to say it is a good practice if it can be avoided.
I find if you mount a receiving antenna like GPS, Sirius/XM, or Sat compass in the radar beam (of Mag Radar) they will last about three years before the front end amplifier(s) normally start becoming intermittent and eventually go out. I hate to see people have problems in or out of warranty. It is one of the most common installation mistakes. Of course if you don't use the boat much it will most likely last longer than that. You will find users on the forum where we discussed this before and they were replacing their GPS about every three years... Yep, this is that why. We can't change physics.
Back to the VHF, I really can't say if 2 feet will be good enough or not. I can say it is closer than NMEA recommendations but I have seen some GPS units at 2 feet that have lasted. I guess it depends on how much the radio is used (or AIS transmitted). There are always trade offs on boats. Sometimes you take the best of the evils. Without having a product history, I don't know how the SCX20 will like the RF, if getting more than it's share. It has a large internal antenna array to get the six vectors it uses, so I worry a bit more of stepping over the standards. As I said before the more distance from a transmitting source the better but sometimes you got to do what you got to do. The better you treat it, the better it will treat you.
sheakx":3kzdun0s said:I just received my SCX20 and found the same gasket issue. If you look at the roof mount BOM that is in the operators manual, there is an attachment gasket (item 1) and a roof mount gasket (item 3). The 2 gaskets are packed nested and look like one piece but they are not. Unfortunately the instructions call the BOM roof mount gasket the attachment gasket which is a discrepancy in the documentation. The instructions say nothing about the BOM attachment gasket. I too found that what the BOM calls the attachment gasket fits nicely between the roof mount and the SCX20 with some play which may go away when the 3 screws are installed. This BOM attachment gasket did not make it into the assembly instructions and the naming error in the assembly instructions adds further confusion. I don' believe the BOM attachment gasket needs sealant thinking that it will fit tighter when the 3 screws are installed. Some clarification on this would be nice. Hope this helps....
When I tightened the screws on Quitsa's SCX20 there was still about a 1.5mm gap between the gasket and antenna which is why I added the bead of the supplied adhesive. As usual, I probably used too big of a bead, after tightening the screws I had squeeze out all around but that wasn't too hard to clean as the adhesive is slow setting.
Similar threads
- Replies
- 6
- Views
- 667
- Replies
- 4
- Views
- 579


